The standard throat that comes with a new table saw is meant to offer adequate clearance around the blade as it rotates at speed. Although this is good enough, a standard throat is less effective when it comes to supporting your workpiece close to the side of the blade. This can lead to a chip-out or cause thin pieces of waste material to jam between the blade and the throat insert.
So, why use a zero clearance table saw insert? The solution to the problems above is to replace the standard throat with a zero-clearance insert. A zero-clearance insert is a replacement for the original throat insert that you get when you buy a new table saw.
Contents
Why Use a Zero-Clearance Table Saw Insert?
A zero clearance table saw insert improves the quality of the cuts that you make with your table saw and makes the equipment safer to use. A zero-clearance table saw insert replaces your standard insert and reduces the size of the table saw’s blade opening to virtually zero.
This is because the zero-clearance slot has a space that practically just fits the blade, i.e., not wider than the blade. The perfect fit between the blade and the zero-clearance slot occurs as a result of raising the blade through the specially designed slot.
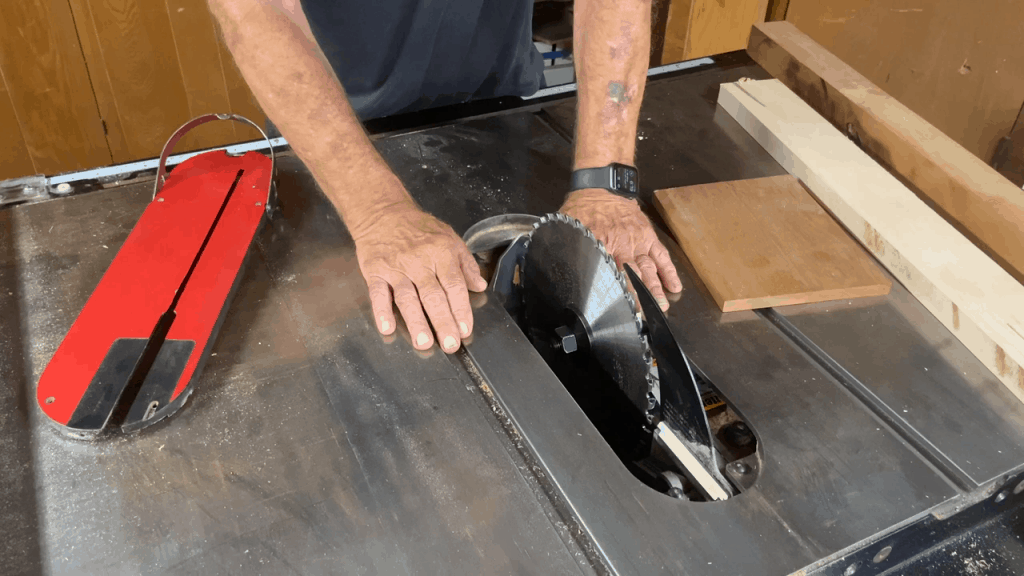
The result of this change is that the size of the slot is reduced such that the opening can perfectly fit the kerf of the blade.
Consequently, your workpiece cannot get stuck in the slot, which significantly reduces the possibility of a tear-out on your workpiece. Your safety is also enhanced because the zero-clearance insert helps avert the possibility of a kickback as you rip your workpiece through the blade.
How to Install a Zero-Clearance Table Saw Insert
Fitting a zero-clearance table saw insert is a common task, even if you just have a beginner table saw. You will first have to remove the throat insert and then follow the steps below.
Preparation
With a zero-clearance table saw insert, there is practically no space left at the sides of the blade. The first step is therefore to install and adjust the insert in the throat opening. You should take your time at this stage of the installation procedure because an error can be costly.
- As part of the preparation, you need to ensure that the throat cavity is totally clean. Any accumulation of dust or debris on the zero-clearance insert can cause the blade to touch the sides of the slot and therefore not work effectively.
- You should also ensure that you have the right type of table saw blade for your table saw and that the insert is installed appropriately.
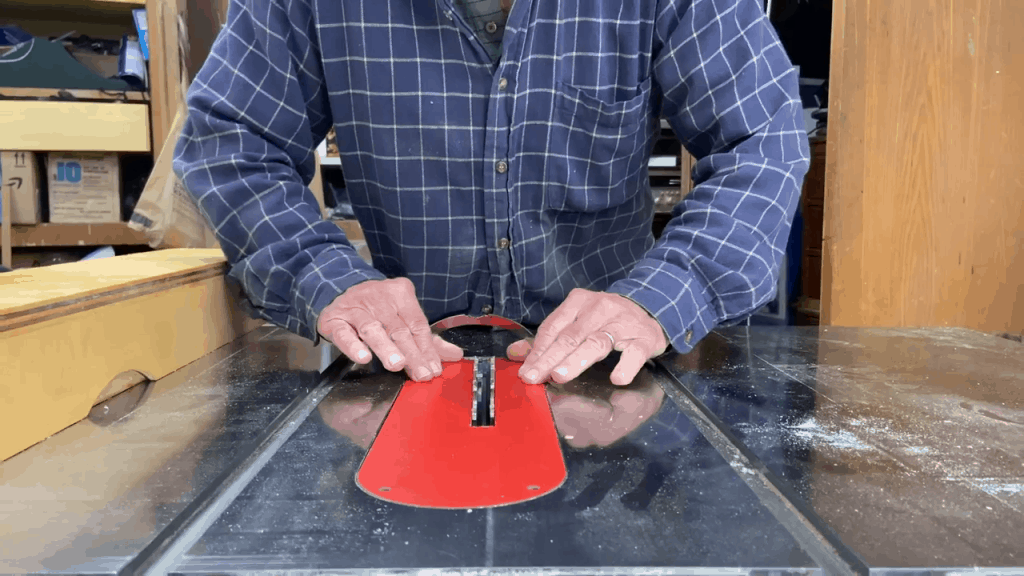
Fitting and Adjusting as Required
- First, you need to use leveling screws to create the insert flush within or slightly underneath the surface of the table (within a range of 0.001”). This step is meant to ensure that the zero-clearance insert is not positioned above the surface such that workpieces can stick on its edge.
- Next, you should finetune the insert so that it fits the throat cavity. Most inserts come with screw-like adjusters on at least two of their edges. These adjustments need to be backed out so that the zero clearance insert fits into the cavity with no side-to-side or front to back movement. This step can be a little demanding but will pay off in the end.
Clamping the Insert
Most manufacturers of zero-clearance inserts recommend that you clamp a board across the table saw’s top such that the board covers whole of the insert. A sturdy board of 3/4” thickness will function just fine although many woodworkers use boards that are 1.5” thick.
The most important point to note is that both ends of the board should be fastened securely to the table saw and the board should cover the zero-clearance insert.
Cutting the Slot
The following are some of the key points that you should note:
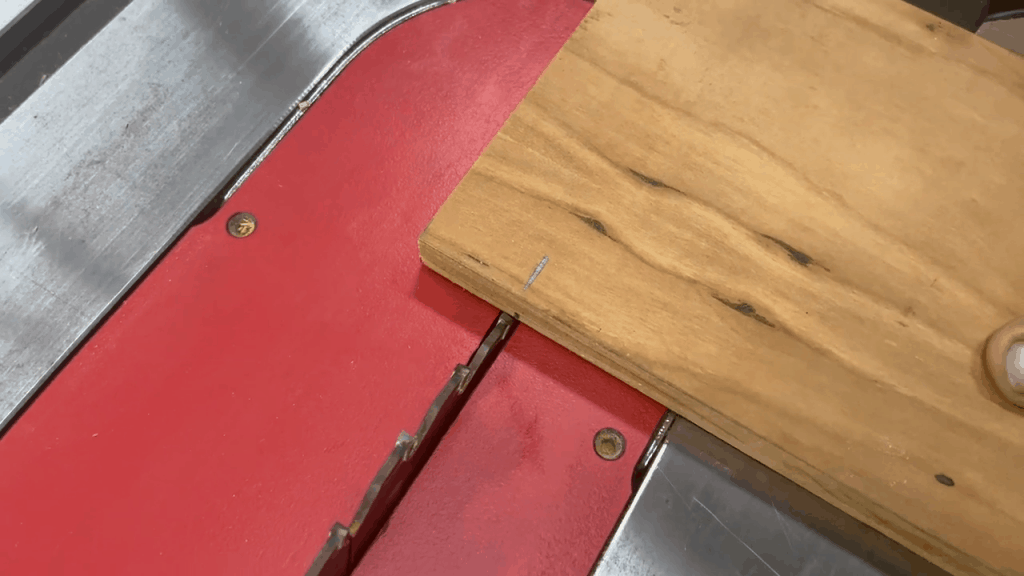
- If your table saw has a riving knife, you should ensure that the zero-clearance insert is compatible.
- You should also remove the riving knife before you start making the slot.
Once you have carried out the above steps, you should proceed as follows:
- Start the saw and progressively increase the speed of the blade.
- Next, you will need to raise the blade.
- Once the blade has completely cut the slot, you should lower it and raise it over again. Repeat this process until the opening is fully made.
How Important is a Zero-Clearance Table Saw Insert?
A zero-clearance table saw insert is one of the most important accessories you can acquire for your table saw if you are concerned about your safety and the quality of your cuts.
Conclusion
A zero-clearance table saw insert helps improve the quality of the cuts that you make using your table saw and also enhances your safety by preventing possible kickbacks.
By reducing the size of the blade opening, a zero-clearance insert makes your table saw safer to use and prevents workpiece rip-outs, resulting in high-quality cuts.
![Best Chainsaw Helmets Reviews for 2023 – [Top Picks & Buyer’s Guide] 6 Best Chainsaw Helmets Reviews for 2023 – [Top Picks & Buyer’s Guide] Best Chainsaw Helmet](https://brandisawyer.com/wp-content/uploads/2020/06/Best-Chainsaw-Helmet.jpg)

![Best Chainsaw Bar in 2023 – [Get the Smoothest Cuts] 9 Best Chainsaw Bar in 2023 – [Get the Smoothest Cuts] Best-Chainsaw-Bar](https://brandisawyer.com/wp-content/uploads/2021/03/Best-Chainsaw-Bar.jpg)